


How to Create an Excel File in C# (.NET Tutorial)
Most teams I work with need to generate Excel files at least as often as they read them: invoices, exports, monthly reports the finance team can open and filter. I've built this flow dozens of times across console apps, ASP.NET services, and background workers. IronXL's API is close enough to the way Excel itself thinks that the code reads almost like a spec, but there are a few formatting and save decisions that matter more than the API surface lets on. This guide is how I actually generate XLSX files in production, including the gotchas that cost me time the first few times around.
The library runs on .NET 8, .NET 9, .NET Core, and .NET Framework, on Windows, Linux, macOS, Azure, and AWS, without Microsoft Office on the host. The code paths below are the same across all of those targets.
Quick Start: Create an Excel File
Three lines stand up a new workbook, write a value into A1, and save the file to disk. No Excel process involved, no COM marshaling.
-
Install IronXL with NuGet Package Manager
-
Copy and run this code snippet.
WorkBook book = IronXL.WorkBook.Create(IronXL.ExcelFileFormat.XLSX); book.CreateWorkSheet("Sheet1")["A1"].Value = "Hello World"; book.SaveAs("MyFile.xlsx"); -
Deploy to test on your live environment
Start using IronXL in your project today with a free trial

Minimal Workflow (5 steps)
- Download and install the IronXL C# library
- Set up your .NET project
- Create a
WorkbookandWorksheet - Set cell values, formatting, and formulas
- Save your Excel file
What is IronXL and Why Use It for Excel File Creation?
IronXL is a C# and VB.NET Excel API for reading, editing, and creating spreadsheet files. It does not require Microsoft Office or Excel Interop, which keeps deployment to a NuGet reference and a using directive.
IronXL fully supports .NET 9, .NET 8, .NET Core, .NET Framework, Xamarin, Mobile, Linux, macOS, and Azure environments.
IronXL Features
- Human support directly from our .NET development team
- Rapid installation with Microsoft Visual Studio
- FREE for development. Licenses from $999
How Can I Quickly Create and Save an Excel File?
Install IronXL via NuGet or download the DLL directly. The WorkBook class is the entry point for all Excel operations, and the WorkSheet class exposes methods for manipulating individual sheets. The full step-by-step walkthrough begins in Step 1 below.
How Do I Install the IronXL C# Library?
Install IronXL via NuGet Package Manager in Visual Studio or use the Package Manager Console:
Install-Package IronXL.Excel
Access the NuGet Package Manager through the Project menu or by right-clicking your project in Solution Explorer.
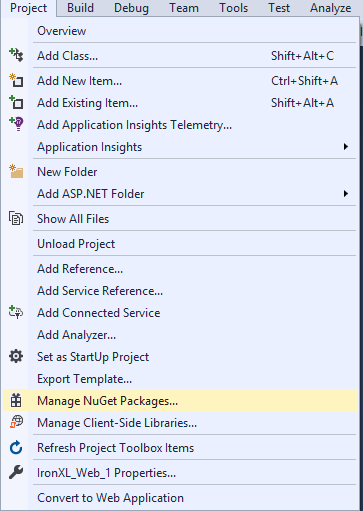
Figure 3 - Access NuGet Package Manager through Project menu
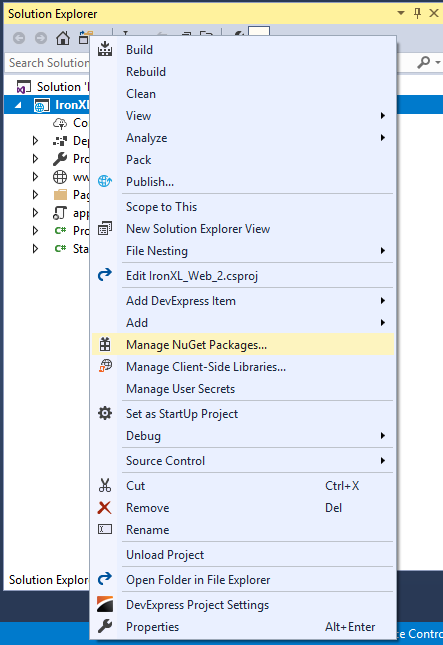
Figure 4 - Right-click context menu in Solution Explorer
Browse for IronXL.Excel in the package list and click Install.

Figure 5 - Installing IronXL.Excel through NuGet Package Manager
Alternatively, download the IronXL DLL directly and add it as a reference to your project via Solution Explorer > References > Browse for IronXL.dll.
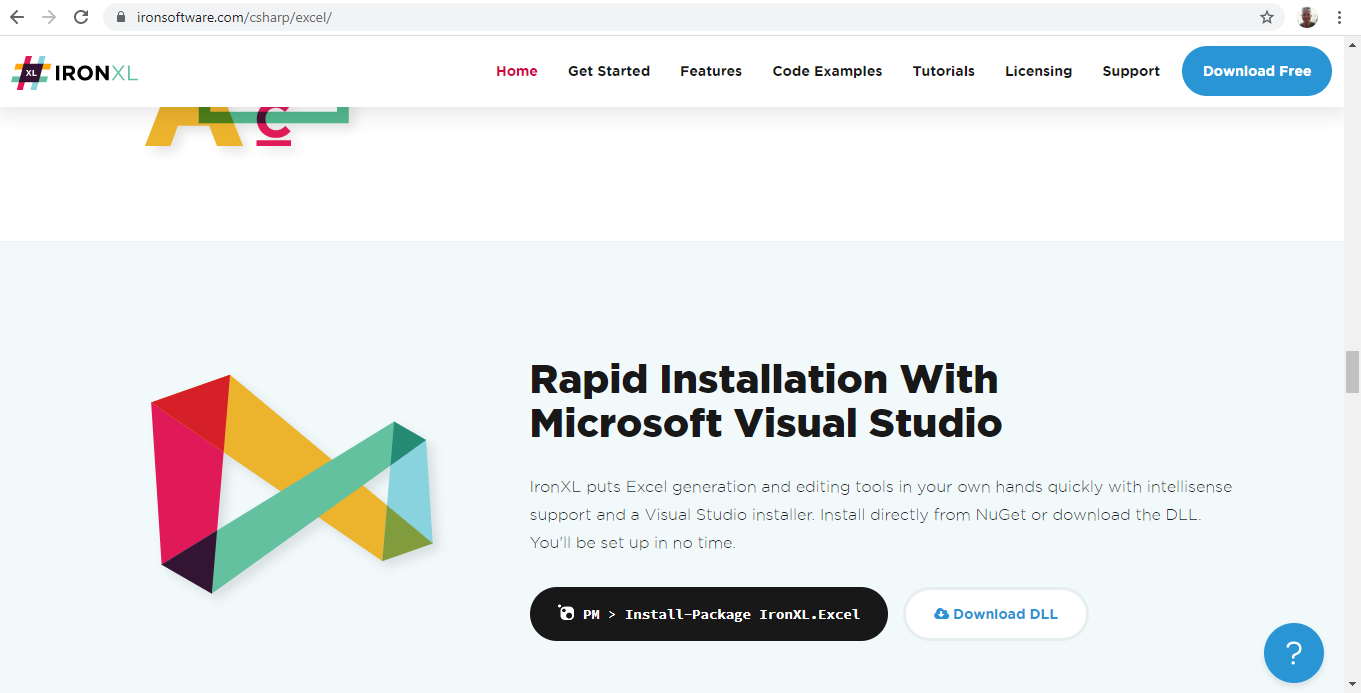
Figure 6 - Download IronXL library from official website
{i:(IronXL requires no Microsoft Office or Excel Interop installation. It runs on any .NET-supported platform including Windows, Linux, macOS, and cloud environments.)}
How Do I Set Up My .NET Project?
IronXL works with any .NET project type: console apps, ASP.NET web apps, APIs, or desktop tools. The example below uses an ASP.NET Web Application, but the same code paths work across all project templates.
Follow these steps to create an ASP.NET website:
- Open Visual Studio
- Click File > New Project
- Select Web under Visual C# in the Project type list
-
Select ASP.NET Web Application
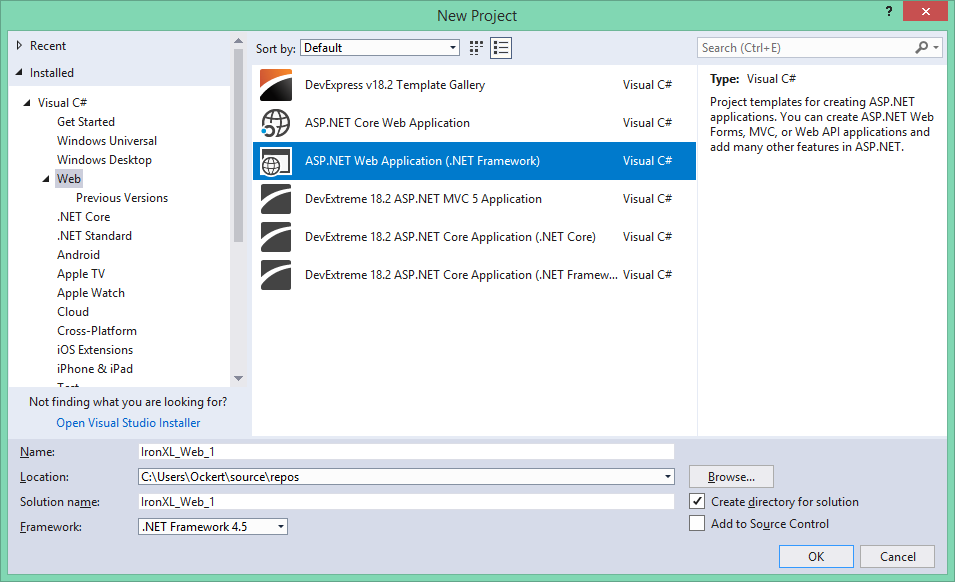
Figure 1 – Create new ASP.NET project
- Click OK
-
Select Web Forms template

Figure 2 – Select Web Forms template
- Click OK
With your project ready, install IronXL to start creating Excel files programmatically.
How Do I Create an Excel Workbook in C#?
A new workbook is a single call to WorkBook.Create, with the file format passed in as an enum:
:path=/static-assets/excel/content-code-examples/tutorials/create-excel-file-net-3.csWorkSheet workSheet = workBook.CreateWorkSheet("2020 Budget");Dim workSheet As WorkSheet = workBook.CreateWorkSheet("2020 Budget")The Create method supports both XLS (Excel 97-2003) and XLSX (Excel 2007+) formats. XLSX is recommended for better performance and smaller file sizes.
- XLSX: Recommended for all modern Excel versions (2007+) — smaller files, better performance
- XLS: Legacy format for compatibility with Excel 97–2003
How Do I Add a Worksheet to My Workbook?
Add worksheets through CreateWorkSheet:
:path=/static-assets/excel/content-code-examples/tutorials/create-excel-file-net-4.csworkSheet["A1"].Value = "January";
workSheet["B1"].Value = "February";
workSheet["C1"].Value = "March";
workSheet["D1"].Value = "April";
workSheet["E1"].Value = "May";
workSheet["F1"].Value = "June";
workSheet["G1"].Value = "July";
workSheet["H1"].Value = "August";
workSheet["I1"].Value = "September";
workSheet["J1"].Value = "October";
workSheet["K1"].Value = "November";
workSheet["L1"].Value = "December";workSheet("A1").Value = "January"
workSheet("B1").Value = "February"
workSheet("C1").Value = "March"
workSheet("D1").Value = "April"
workSheet("E1").Value = "May"
workSheet("F1").Value = "June"
workSheet("G1").Value = "July"
workSheet("H1").Value = "August"
workSheet("I1").Value = "September"
workSheet("J1").Value = "October"
workSheet("K1").Value = "November"
workSheet("L1").Value = "December"A workbook contains one or more worksheets. Each worksheet consists of rows and columns, with cells at their intersections. Use the CreateWorkSheet method to add new sheets to your workbook.
WorkBook.CreateWorkSheet(String): Adds a new sheet with the given tab nameWorkSheet: Retrieves an existing sheet by name- Sheet names must be unique within a workbook
How Do I Set Cell Values in Excel?
How Can I Set Cell Values Manually?
Cell access uses the same A1-style address strings you see in Excel:
:path=/static-assets/excel/content-code-examples/tutorials/create-excel-file-net-5.csRandom r = new Random();
for (int i = 2 ; i <= 11 ; i++)
{
workSheet["A" + i].Value = r.Next(1, 1000);
workSheet["B" + i].Value = r.Next(1000, 2000);
workSheet["C" + i].Value = r.Next(2000, 3000);
workSheet["D" + i].Value = r.Next(3000, 4000);
workSheet["E" + i].Value = r.Next(4000, 5000);
workSheet["F" + i].Value = r.Next(5000, 6000);
workSheet["G" + i].Value = r.Next(6000, 7000);
workSheet["H" + i].Value = r.Next(7000, 8000);
workSheet["I" + i].Value = r.Next(8000, 9000);
workSheet["J" + i].Value = r.Next(9000, 10000);
workSheet["K" + i].Value = r.Next(10000, 11000);
workSheet["L" + i].Value = r.Next(11000, 12000);
}Dim r As New Random()
For i As Integer = 2 To 11
workSheet("A" & i).Value = r.Next(1, 1000)
workSheet("B" & i).Value = r.Next(1000, 2000)
workSheet("C" & i).Value = r.Next(2000, 3000)
workSheet("D" & i).Value = r.Next(3000, 4000)
workSheet("E" & i).Value = r.Next(4000, 5000)
workSheet("F" & i).Value = r.Next(5000, 6000)
workSheet("G" & i).Value = r.Next(6000, 7000)
workSheet("H" & i).Value = r.Next(7000, 8000)
workSheet("I" & i).Value = r.Next(8000, 9000)
workSheet("J" & i).Value = r.Next(9000, 10000)
workSheet("K" & i).Value = r.Next(10000, 11000)
workSheet("L" & i).Value = r.Next(11000, 12000)
Next iThe Value property accepts various data types including strings, numbers, dates, and booleans. IronXL automatically formats cells based on the data type.
How Do I Set Cell Values Dynamically?
When the row count is known at runtime, string interpolation makes the loop body easy to read:
// Initialize random number generator for sample data
Random r = new Random();

// Populate cells with random budget data for each month
for (int i = 2; i <= 11; i++)
{
    // Set different budget categories with increasing ranges
    workSheet[$"A{i}"].Value = r.Next(1, 1000);     // Office Supplies
    workSheet[$"B{i}"].Value = r.Next(1000, 2000);  // Utilities
    workSheet[$"C{i}"].Value = r.Next(2000, 3000);  // Rent
    workSheet[$"D{i}"].Value = r.Next(3000, 4000);  // Salaries
    workSheet[$"E{i}"].Value = r.Next(4000, 5000);  // Marketing
    workSheet[$"F{i}"].Value = r.Next(5000, 6000);  // IT Services
    workSheet[$"G{i}"].Value = r.Next(6000, 7000);  // Travel
    workSheet[$"H{i}"].Value = r.Next(7000, 8000);  // Training
    workSheet[$"I{i}"].Value = r.Next(8000, 9000);  // Insurance
    workSheet[$"J{i}"].Value = r.Next(9000, 10000); // Equipment
    workSheet[$"K{i}"].Value = r.Next(10000, 11000); // Research
    workSheet[$"L{i}"].Value = r.Next(11000, 12000); // Misc
}

// Alternative: Set range of cells with same value
workSheet["A13:L13"].Value = 0; // Initialize totals row
// Initialize random number generator for sample data
Random r = new Random();
// Populate cells with random budget data for each month
for (int i = 2; i <= 11; i++)
{
// Set different budget categories with increasing ranges
workSheet[$"A{i}"].Value = r.Next(1, 1000); // Office Supplies
workSheet[$"B{i}"].Value = r.Next(1000, 2000); // Utilities
workSheet[$"C{i}"].Value = r.Next(2000, 3000); // Rent
workSheet[$"D{i}"].Value = r.Next(3000, 4000); // Salaries
workSheet[$"E{i}"].Value = r.Next(4000, 5000); // Marketing
workSheet[$"F{i}"].Value = r.Next(5000, 6000); // IT Services
workSheet[$"G{i}"].Value = r.Next(6000, 7000); // Travel
workSheet[$"H{i}"].Value = r.Next(7000, 8000); // Training
workSheet[$"I{i}"].Value = r.Next(8000, 9000); // Insurance
workSheet[$"J{i}"].Value = r.Next(9000, 10000); // Equipment
workSheet[$"K{i}"].Value = r.Next(10000, 11000); // Research
workSheet[$"L{i}"].Value = r.Next(11000, 12000); // Misc
}
// Alternative: Set range of cells with same value
workSheet["A13:L13"].Value = 0; // Initialize totals row' Initialize random number generator for sample data
Dim r As New Random()
' Populate cells with random budget data for each month
For i As Integer = 2 To 11
' Set different budget categories with increasing ranges
workSheet($"A{i}").Value = r.Next(1, 1000) ' Office Supplies
workSheet($"B{i}").Value = r.Next(1000, 2000) ' Utilities
workSheet($"C{i}").Value = r.Next(2000, 3000) ' Rent
workSheet($"D{i}").Value = r.Next(3000, 4000) ' Salaries
workSheet($"E{i}").Value = r.Next(4000, 5000) ' Marketing
workSheet($"F{i}").Value = r.Next(5000, 6000) ' IT Services
workSheet($"G{i}").Value = r.Next(6000, 7000) ' Travel
workSheet($"H{i}").Value = r.Next(7000, 8000) ' Training
workSheet($"I{i}").Value = r.Next(8000, 9000) ' Insurance
workSheet($"J{i}").Value = r.Next(9000, 10000) ' Equipment
workSheet($"K{i}").Value = r.Next(10000, 11000) ' Research
workSheet($"L{i}").Value = r.Next(11000, 12000) ' Misc
Next i
' Alternative: Set range of cells with same value
workSheet("A13:L13").Value = 0 ' Initialize totals rowString interpolation ($"...") makes it easy to reference cells dynamically. The Item indexer supports both individual cells and ranges.
How Do I Populate Excel from a Database?
Loading data from databases into Excel is a common requirement:
:path=/static-assets/excel/content-code-examples/tutorials/create-excel-file-net-7.csworkSheet["A1:L1"].Style.SetBackgroundColor("#d3d3d3");workSheet("A1:L1").Style.SetBackgroundColor("#d3d3d3")This example demonstrates reading Excel data from databases, applying formatting, and using formulas for calculations. The FormatString property enables custom number formatting just like in Excel.
How Do I Apply Formatting to Excel Cells?
How Can I Set Background Colors in Excel?
Backgrounds, alternating row colors, and font color overrides all go through the Style object on a cell or range:
// Set header row background to light gray using hex color
workSheet["A1:L1"].Style.SetBackgroundColor("#d3d3d3");

// Apply different colors for data categorization
workSheet["A2:A11"].Style.SetBackgroundColor("#E7F3FF"); // Light blue for January
workSheet["B2:B11"].Style.SetBackgroundColor("#FFF2CC"); // Light yellow for February

// Highlight important cells with bold colors
workSheet["L12"].Style.SetBackgroundColor("#FF0000"); // Red for totals
workSheet["L12"].Style.Font.SetColor("#FFFFFF"); // White text

// Create alternating row colors for better readability
for (int row = 2; row <= 11; row++)
{
    if (row % 2 == 0)
    {
        workSheet[$"A{row}:L{row}"].Style.SetBackgroundColor("#F2F2F2");
    }
}
// Set header row background to light gray using hex color
workSheet["A1:L1"].Style.SetBackgroundColor("#d3d3d3");
// Apply different colors for data categorization
workSheet["A2:A11"].Style.SetBackgroundColor("#E7F3FF"); // Light blue for January
workSheet["B2:B11"].Style.SetBackgroundColor("#FFF2CC"); // Light yellow for February
// Highlight important cells with bold colors
workSheet["L12"].Style.SetBackgroundColor("#FF0000"); // Red for totals
workSheet["L12"].Style.Font.SetColor("#FFFFFF"); // White text
// Create alternating row colors for better readability
for (int row = 2; row <= 11; row++)
{
if (row % 2 == 0)
{
workSheet[$"A{row}:L{row}"].Style.SetBackgroundColor("#F2F2F2");
}
}' Set header row background to light gray using hex color
workSheet("A1:L1").Style.SetBackgroundColor("#d3d3d3")
' Apply different colors for data categorization
workSheet("A2:A11").Style.SetBackgroundColor("#E7F3FF") ' Light blue for January
workSheet("B2:B11").Style.SetBackgroundColor("#FFF2CC") ' Light yellow for February
' Highlight important cells with bold colors
workSheet("L12").Style.SetBackgroundColor("#FF0000") ' Red for totals
workSheet("L12").Style.Font.SetColor("#FFFFFF") ' White text
' Create alternating row colors for better readability
For row As Integer = 2 To 11
If row Mod 2 = 0 Then
workSheet($"A{row}:L{row}").Style.SetBackgroundColor("#F2F2F2")
End If
Next rowThe SetBackgroundColor method accepts hex color codes. Pair background colors with Font.SetColor to keep contrast readable on darker fills.
How Do I Create Borders in Excel?
Borders help define data regions and improve structure:
:path=/static-assets/excel/content-code-examples/tutorials/create-excel-file-net-9.cs// Use IronXL built-in aggregations
decimal sum = workSheet["A2:A11"].Sum();
decimal avg = workSheet["B2:B11"].Avg();
decimal max = workSheet["C2:C11"].Max();
decimal min = workSheet["D2:D11"].Min();
// Assign value to cells
workSheet["A12"].Value = sum;
workSheet["B12"].Value = avg;
workSheet["C12"].Value = max;
workSheet["D12"].Value = min;' Use IronXL built-in aggregations
Dim sum As Decimal = workSheet("A2:A11").Sum()
Dim avg As Decimal = workSheet("B2:B11").Avg()
Dim max As Decimal = workSheet("C2:C11").Max()
Dim min As Decimal = workSheet("D2:D11").Min()
' Assign value to cells
workSheet("A12").Value = sum
workSheet("B12").Value = avg
workSheet("C12").Value = max
workSheet("D12").Value = minIronXL supports various border types including Thin, Medium, Thick, Double, Dotted, and Dashed. Each border side can be styled independently.
How Do I Use Excel Formulas in C#?
IronXL evaluates Excel formulas at write time, so the values are correct as soon as the workbook is saved:
// Use built-in aggregation functions for ranges
decimal sum = workSheet["A2:A11"].Sum();
decimal avg = workSheet["B2:B11"].Avg();
decimal max = workSheet["C2:C11"].Max();
decimal min = workSheet["D2:D11"].Min();

// Assign calculated values to cells
workSheet["A12"].Value = sum;
workSheet["B12"].Value = avg;
workSheet["C12"].Value = max;
workSheet["D12"].Value = min;

// Or use Excel formulas directly
workSheet["A12"].Formula = "=SUM(A2:A11)";
workSheet["B12"].Formula = "=AVERAGE(B2:B11)";
workSheet["C12"].Formula = "=MAX(C2:C11)";
workSheet["D12"].Formula = "=MIN(D2:D11)";

// Complex formulas with multiple functions
workSheet["E12"].Formula = "=IF(SUM(E2:E11)>50000,\"Over Budget\",\"On Track\")";
workSheet["F12"].Formula = "=SUMIF(F2:F11,\">5000\")";

// Percentage calculations
workSheet["G12"].Formula = "=G11/SUM(G2:G11)*100";
workSheet["G12"].FormatString = "0.00%";

// Ensure all formulas calculate
workBook.EvaluateAll();
// Use built-in aggregation functions for ranges
decimal sum = workSheet["A2:A11"].Sum();
decimal avg = workSheet["B2:B11"].Avg();
decimal max = workSheet["C2:C11"].Max();
decimal min = workSheet["D2:D11"].Min();
// Assign calculated values to cells
workSheet["A12"].Value = sum;
workSheet["B12"].Value = avg;
workSheet["C12"].Value = max;
workSheet["D12"].Value = min;
// Or use Excel formulas directly
workSheet["A12"].Formula = "=SUM(A2:A11)";
workSheet["B12"].Formula = "=AVERAGE(B2:B11)";
workSheet["C12"].Formula = "=MAX(C2:C11)";
workSheet["D12"].Formula = "=MIN(D2:D11)";
// Complex formulas with multiple functions
workSheet["E12"].Formula = "=IF(SUM(E2:E11)>50000,\"Over Budget\",\"On Track\")";
workSheet["F12"].Formula = "=SUMIF(F2:F11,\">5000\")";
// Percentage calculations
workSheet["G12"].Formula = "=G11/SUM(G2:G11)*100";
workSheet["G12"].FormatString = "0.00%";
// Ensure all formulas calculate
workBook.EvaluateAll();' Use built-in aggregation functions for ranges
Dim sum As Decimal = workSheet("A2:A11").Sum()
Dim avg As Decimal = workSheet("B2:B11").Avg()
Dim max As Decimal = workSheet("C2:C11").Max()
Dim min As Decimal = workSheet("D2:D11").Min()
' Assign calculated values to cells
workSheet("A12").Value = sum
workSheet("B12").Value = avg
workSheet("C12").Value = max
workSheet("D12").Value = min
' Or use Excel formulas directly
workSheet("A12").Formula = "=SUM(A2:A11)"
workSheet("B12").Formula = "=AVERAGE(B2:B11)"
workSheet("C12").Formula = "=MAX(C2:C11)"
workSheet("D12").Formula = "=MIN(D2:D11)"
' Complex formulas with multiple functions
workSheet("E12").Formula = "=IF(SUM(E2:E11)>50000,""Over Budget"",""On Track"")"
workSheet("F12").Formula = "=SUMIF(F2:F11,"">5000"")"
' Percentage calculations
workSheet("G12").Formula = "=G11/SUM(G2:G11)*100"
workSheet("G12").FormatString = "0.00%"
' Ensure all formulas calculate
workBook.EvaluateAll()The Range class provides methods like Sum, Average, Max, and Min for quick calculations. For more complex scenarios, use the Formula property to set Excel formulas directly.
{t:(Prefer IronXL's built-in .Sum(), .Avg(), .Max(), and .Min() methods over raw formula strings when working with ranges. They are type-safe and avoid formula syntax errors at compile time.)}
How Do I Set Worksheet and Print Properties?
Use IronXL to protect individual worksheets, freeze rows and columns, and set printing format options.
How Can I Configure Worksheet Properties?
Protect worksheets and control viewing options:
:path=/static-assets/excel/content-code-examples/tutorials/create-excel-file-net-11.csworkSheet.SetPrintArea("A1:L12");
workSheet.PrintSetup.PrintOrientation = IronXL.Printing.PrintOrientation.Landscape;
workSheet.PrintSetup.PaperSize = IronXL.Printing.PaperSize.A4;workSheet.SetPrintArea("A1:L12")
workSheet.PrintSetup.PrintOrientation = IronXL.Printing.PrintOrientation.Landscape
workSheet.PrintSetup.PaperSize = IronXL.Printing.PaperSize.A4Worksheet protection prevents accidental modifications while freeze panes keep important rows or columns visible during scrolling.
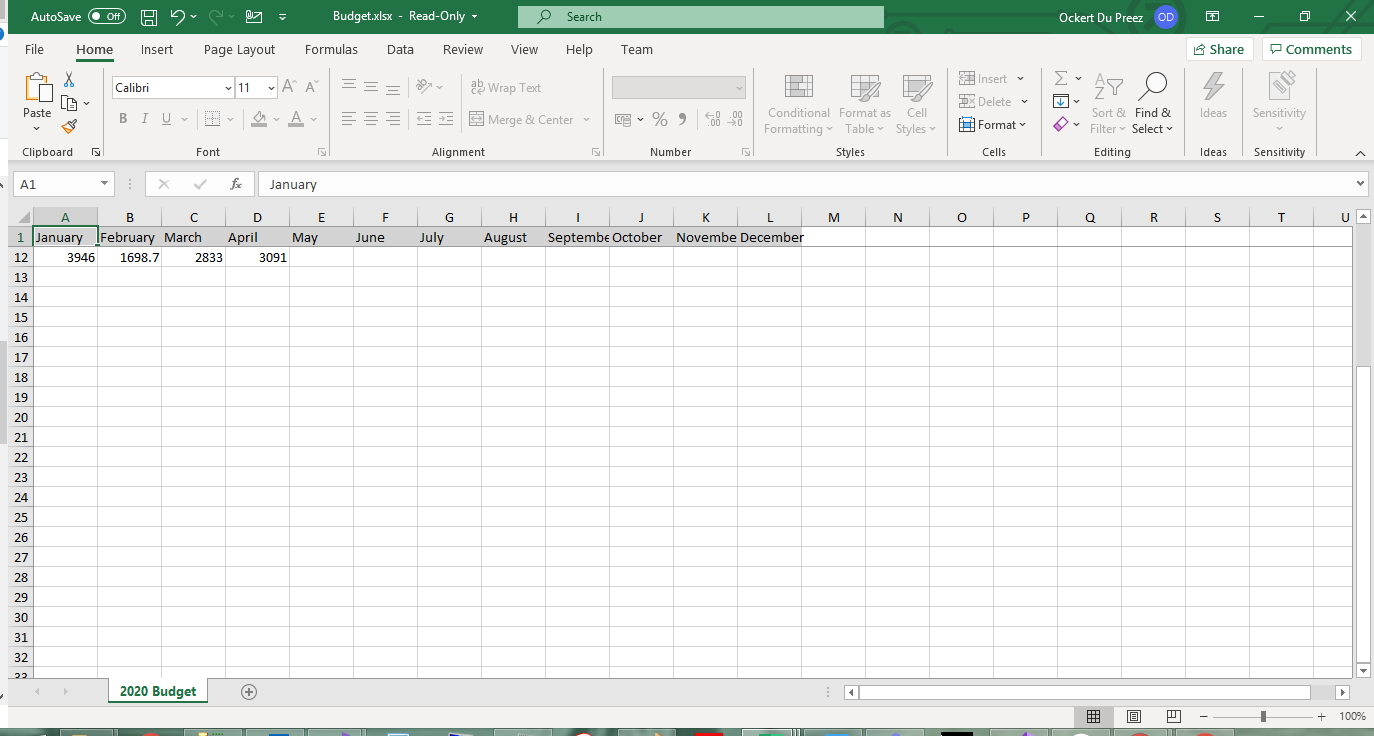
Figure 7 - Frozen header row remains visible while scrolling

Figure 8 - Password protection prevents unauthorized edits
How Do I Configure Page and Print Settings?
Print layout options (orientation, paper size, margins, scaling, headers, footers) are all exposed through WorkSheet.PrintSetup:
:path=/static-assets/excel/content-code-examples/tutorials/create-excel-file-net-12.csworkBook.SaveAs("Budget.xlsx");workBook.SaveAs("Budget.xlsx")The IPrintSetup class provides comprehensive print configuration options matching Excel's print settings.
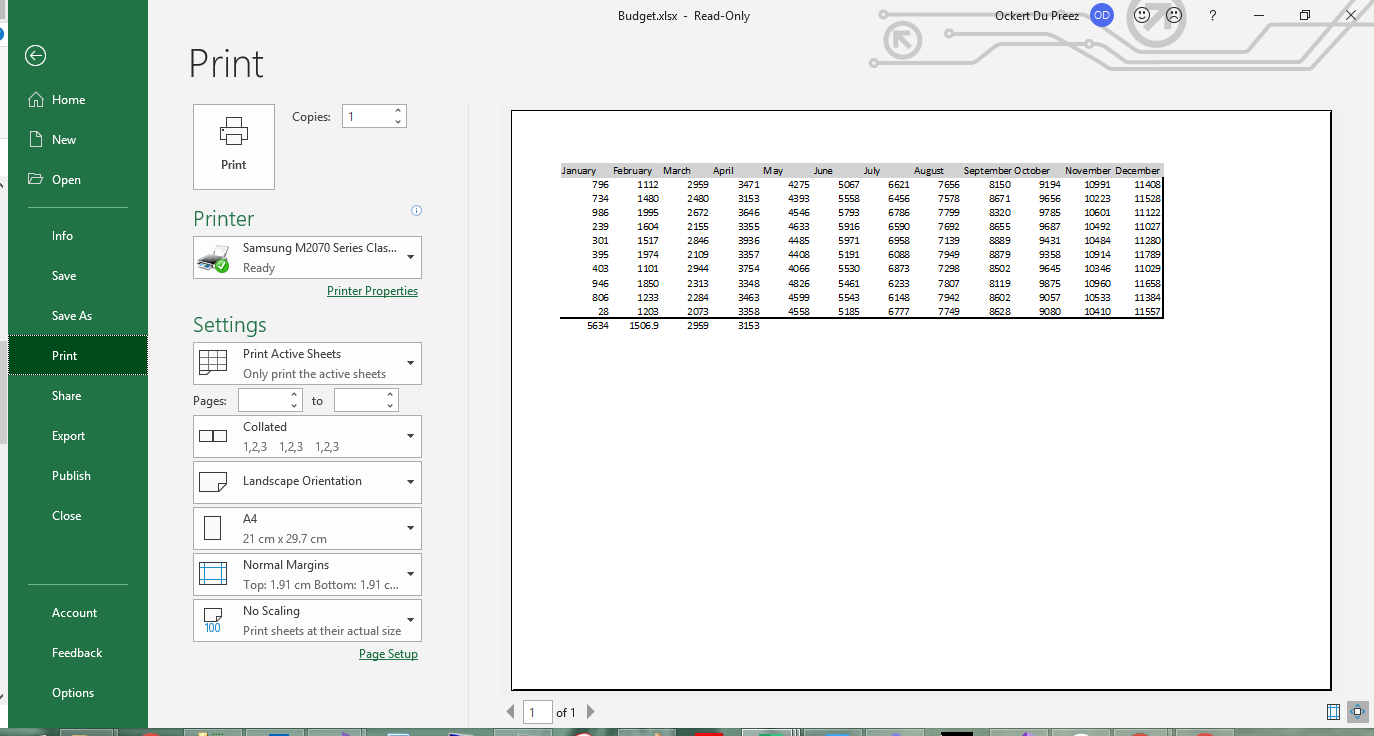
Figure 9 - Print preview with landscape orientation and custom margins
How Do I Save My Excel Workbook?
Save your workbook in various formats:
// Save as XLSX (recommended for modern Excel)
workBook.SaveAs("Budget.xlsx");

// Save as XLS for legacy compatibility
workBook.SaveAs("Budget.xls");

// Save as CSV for data exchange
workBook.SaveAsCsv("Budget.csv");

// Save as JSON for web applications
workBook.SaveAsJson("Budget.json");

// Save to stream for web downloads or cloud storage
using (var stream = new MemoryStream())
{
    workBook.SaveAs(stream);
    byte[] excelData = stream.ToArray();
    // Send to client or save to cloud
}

// Save as CSV — IronXL writes UTF-8 by default
workBook.SaveAsCsv("Budget_UTF8.csv");
// Save as XLSX (recommended for modern Excel)
workBook.SaveAs("Budget.xlsx");
// Save as XLS for legacy compatibility
workBook.SaveAs("Budget.xls");
// Save as CSV for data exchange
workBook.SaveAsCsv("Budget.csv");
// Save as JSON for web applications
workBook.SaveAsJson("Budget.json");
// Save to stream for web downloads or cloud storage
using (var stream = new MemoryStream())
{
workBook.SaveAs(stream);
byte[] excelData = stream.ToArray();
// Send to client or save to cloud
}
// Save as CSV — IronXL writes UTF-8 by default
workBook.SaveAsCsv("Budget_UTF8.csv");' Save as XLSX (recommended for modern Excel)
workBook.SaveAs("Budget.xlsx")
' Save as XLS for legacy compatibility
workBook.SaveAs("Budget.xls")
' Save as CSV for data exchange
workBook.SaveAsCsv("Budget.csv")
' Save as JSON for web applications
workBook.SaveAsJson("Budget.json")
' Save to stream for web downloads or cloud storage
Using stream As New MemoryStream()
workBook.SaveAs(stream)
Dim excelData As Byte() = stream.ToArray()
' Send to client or save to cloud
End Using
' Save as CSV — IronXL writes UTF-8 by default
workBook.SaveAsCsv("Budget_UTF8.csv")IronXL supports multiple export formats including XLSX, XLS, CSV, TSV, and JSON. The Save method picks the format from the file extension.
- XLSX / XLS: Full Excel format with formatting, formulas, and multiple sheets
- CSV: Plain text for data interchange, one sheet per file
- JSON: Structured output for web APIs and data pipelines
- Stream: In-memory output, useful for web downloads or cloud storage
How long does generation actually take?
For a workbook around the size most production exports end up at — on the order of 10,000 rows and a few columns — generation and a single SaveAs to disk is typically sub-second once the process is warm. The first run in a fresh process is slower because it is dominated by IronXL's assembly load and JIT warm-up; subsequent runs settle into a faster, fairly steady range with some run-to-run variance from background activity. Exact timings are environment-specific, so measure on your own target hardware rather than relying on a single published figure — the reproducible harness in the CreateExcelBenchmark sample below lets you do exactly that.
For substantially larger workbooks (hundreds of thousands of rows, multiple sheets, heavy styling), write the whole workbook in memory and call SaveAs exactly once at the end. The single most common cause of "why is my export so slow?" tickets we see is calling SaveAs repeatedly inside a loop while the workbook is growing: every save serializes the entire current state, so the cost climbs with each iteration.
Common Gotchas
A few things bite people often enough that they deserve their own section.
Forgetting FormatString on dates and currency
The formatting trap I see most: setting .Value to a DateTime but forgetting FormatString. The date is stored correctly, but Excel displays it as a raw serial number (45292 means 2024-01-01) until you apply a format string like "yyyy-MM-dd". Currency has the identical problem: the number is right, but without "$#,##0.00" it renders as a bare decimal. I now write the value and the format on adjacent lines, so the two cannot drift apart:
var dateCell = sheet["A2"];
dateCell.Value = DateTime.Today;
dateCell.FormatString = "yyyy-MM-dd";

var moneyCell = sheet["B2"];
moneyCell.Value = 1499.95m;
moneyCell.FormatString = "$#,##0.00";
var dateCell = sheet["A2"];
dateCell.Value = DateTime.Today;
dateCell.FormatString = "yyyy-MM-dd";
var moneyCell = sheet["B2"];
moneyCell.Value = 1499.95m;
moneyCell.FormatString = "$#,##0.00";Dim dateCell = sheet("A2")
dateCell.Value = DateTime.Today
dateCell.FormatString = "yyyy-MM-dd"
Dim moneyCell = sheet("B2")
moneyCell.Value = 1499.95D
moneyCell.FormatString = "$#,##0.00"XLS will silently truncate at 65,536 rows
This one is mentioned in the format choice section near the top of the article, but it earns its place here because the failure mode is silent: ExcelFileFormat.XLS caps at 65,536 rows per sheet, and rows past that limit are dropped without an exception or warning. The export "succeeds" and your data is gone. Pick XLSX for anything data-heavy unless a downstream system literally cannot read it.
"Excel says the file is corrupt"
If a generated file refuses to open or Excel claims it is corrupt, the cause is almost always one of two things. Either the file stream was not disposed properly, so the bytes on disk are truncated; or you wrote to a path that was still locked by a previous run, and only some of the data made it through. Make sure SaveAs (or the stream wrapping it) has fully completed before anything else touches the file, and prefer a using block around any MemoryStream or FileStream you wrap a workbook into.
Sample project for the benchmark numbers
If you want to reproduce the timing numbers from earlier, the harness is a small .NET 9 console app:
:path=/static-assets/excel/content-code-examples/tutorials/create-excel-file-net-15.cs// CreateExcelBenchmark/Program.cs (excerpt)
IronXL.License.LicenseKey = Environment.GetEnvironmentVariable("IRONXL_LICENSE_KEY");
var sw = Stopwatch.StartNew();
var workbook = WorkBook.Create(ExcelFileFormat.XLSX);
var sheet = workbook.CreateWorkSheet("Data");
sheet["A1"].Value = "Id";
sheet["B1"].Value = "Name";
sheet["C1"].Value = "Amount";
for (int i = 0; i < 10_000; i++)
{
int row = i + 2;
sheet[$"A{row}"].Value = i + 1;
sheet[$"B{row}"].Value = $"Item {i + 1}";
sheet[$"C{row}"].Value = (i + 1) * 1.25m;
}
workbook.SaveAs("Generated.xlsx");
sw.Stop();
Console.WriteLine($"cold: {sw.Elapsed.TotalMilliseconds:F1} ms");
Imports System
Imports System.Diagnostics
Imports IronXL

Module Program
    Sub Main()
        License.LicenseKey = Environment.GetEnvironmentVariable("IRONXL_LICENSE_KEY")

        Dim sw As Stopwatch = Stopwatch.StartNew()
        Dim workbook As WorkBook = WorkBook.Create(ExcelFileFormat.XLSX)
        Dim sheet As WorkSheet = workbook.CreateWorkSheet("Data")
        sheet("A1").Value = "Id"
        sheet("B1").Value = "Name"
        sheet("C1").Value = "Amount"
        For i As Integer = 0 To 9999
            Dim row As Integer = i + 2
            sheet($"A{row}").Value = i + 1
            sheet($"B{row}").Value = $"Item {i + 1}"
            sheet($"C{row}").Value = (i + 1) * 1.25D
        Next
        workbook.SaveAs("Generated.xlsx")
        sw.Stop()
        Console.WriteLine($"cold: {sw.Elapsed.TotalMilliseconds:F1} ms")
    End Sub
End ModuleRun it under dotnet run -c Release and swap in your own row counts, column counts, or styling to see how the numbers shift with workbook complexity.
Object Reference and Resources
The IronXL API Reference covers every class and method this tutorial touches and the ones it does not.
Additional tutorials for related Excel operations:
Summary
IronXL.Excel generates Excel workbooks in XLSX, XLS, CSV, and JSON without depending on Microsoft Office or Interop. The recipe I follow on every project is the same: create the workbook, add a worksheet, write values and formulas, set format strings where the display matters, and save once at the end.
Ready to use IronXL in production? Start your free trial or view licensing options.
Frequently Asked Questions
How can I create Excel files in C# without using Interop?
You can create Excel files without Interop using IronXL, which provides a simple API: WorkBook workBook = WorkBook.Create(ExcelFileFormat.XLSX). This approach works on any .NET platform without requiring Microsoft Office installation.
What platforms does Excel file creation with C# support?
IronXL supports Excel file creation on .NET 10, .NET 9, .NET 8, .NET Core, .NET Framework 4.6.2+, running on Windows, macOS, Linux, Docker, Azure, and AWS environments.
How do I install a C# library for Excel generation?
Install IronXL via NuGet Package Manager in Visual Studio, use the command PM> Install-Package IronXL.Excel, or download directly from nuget.org.
How do I create a new Excel workbook programmatically?
Create a workbook using IronXL with WorkBook workbook = WorkBook.Create(ExcelFileFormat.XLSX), then add worksheets using workbook.CreateWorkSheet("SheetName").
How can I set cell values in an Excel worksheet using C#?
Set cell values in IronXL using intuitive syntax: worksheet["A1"].Value = "Hello World" or set ranges: worksheet["A1:A10"].Value = 100.
Can I apply formatting to Excel cells programmatically?
Yes, IronXL supports comprehensive formatting including background colors (cell.Style.SetBackgroundColor("#FF0000")), borders, fonts, and number formats.
How do I use Excel formulas in C#?
Apply formulas using IronXL's Formula property: worksheet["A1"].Formula = "=SUM(B1:B10)", or use built-in methods like range.Sum(), range.Avg().
How can I protect an Excel worksheet with a password?
Protect worksheets in IronXL using worksheet.ProtectSheet("YourPassword") to prevent unauthorized modifications.
How do I configure print settings for Excel files?
Set print properties using IronXL's PrintSetup: worksheet.PrintSetup.PrintOrientation = PrintOrientation.Landscape and worksheet.SetPrintArea("A1:Z100").
How do I save an Excel workbook in different formats?
Save workbooks using IronXL's SaveAs method: workbook.SaveAs("file.xlsx") for XLSX, or use SaveAsCsv(), SaveAsJson() for other formats.
How do I populate an Excel sheet with data from a database?
Use IronXL to populate worksheets by fetching data from a database and setting it in cells using methods like worksheet["A1"].Value = dataFromDatabase.
How can I implement freeze panes in an Excel sheet using C#?
Freeze panes in worksheets using IronXL with worksheet.FreezePanes(1, 1) to lock the top row and leftmost column for easier navigation.


Still Scrolling?
Want proof fast? PM > Install-Package IronXL.Excel
run a sample watch your data become a spreadsheet.


