


How to Create an Excel File in C# (.NET Tutorial)
我合作的大多数团队需要生成Excel文件,至少和他们读取文件一样频繁:发票、导出、财务团队可打开并筛选的月度报告。 我已经在控制台应用、ASP.NET服务和后台工作器中多次构建了这个流程。 IronXL的API与Excel本身的思维方式非常接近,代码几乎可以像规格说明一样阅读,但有一些格式化和保存决策比API界面所显示的更重要。 这份指南是我在生产中实际生成XLSX文件的方式,包括最初几次可能会花费我时间的问题。
这个库在.NET 8, .NET 9, .NET Core, 和.NET Framework上运行,包括Windows, Linux, macOS, Azure和AWS,无需在主机上安装Microsoft Office。以下代码路径在所有这些目标上都相同。
快速入门:创建 Excel 文件
三行代码就可以启动一个新的工作簿,在A1中写入一个值,并将文件保存到磁盘。 无需Excel进程参与,无需COM编组。
最小工作流程(5 个步骤)
- 下载并安装 IronXL C# 库
- 设置你的 .NET 项目
- 创建一个
Workbook和Worksheet - 设置单元格值、格式和公式
- 保存您的 Excel 文件
什么是 IronXL?为什么要使用它来创建 Excel 文件?
IronXL是一个用于读取、编辑和创建电子表格文件的C#和VB.NET Excel API。 它不需要Microsoft Office或Excel Interop,从而仅需部署到NuGet引用和using指令。
IronXL 完全支持 .NET 9、.NET 8、.NET Core、.NET Framework、Xamarin、移动、Linux、macOS 和 Azure 环境。
IronXL 功能
- 由我们的 .NET 开发团队直接提供人工支持 using Microsoft Visual Studio 快速安装
- 免费用于开发。 许可证来自$999
如何快速创建并保存Excel文件?
通过 NuGet 安装 IronXL或直接下载 DLL 文件。 WorkSheet类公开用于操作单个工作表的方法。 完整的逐步演练在下面的步骤1开始。
How Do I Install the IronXL C# Library?
在 Visual Studio 中通过 NuGet 包管理器安装 IronXL,或者使用包管理器控制台:
Install-Package IronXL.Excel
通过"项目"菜单或在"解决方案资源管理器"中右键单击项目来访问 NuGet 包管理器。
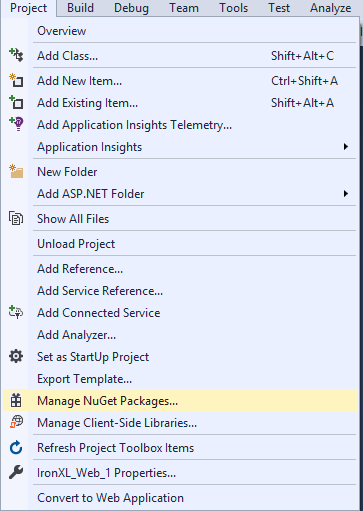 图 3 - 通过项目菜单访问 NuGet 包管理器
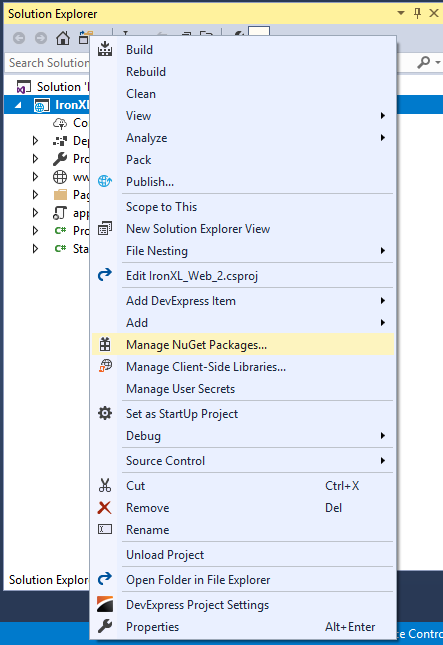 图 4 - 解决方案资源管理器中的右键单击上下文菜单
在包列表中浏览IronXL.Excel并点击安装。
 图 5 - 通过 NuGet 包管理器安装 IronXL.Excel
或者,直接下载IronXL DLL并通过解决方案资源管理器 > 引用 > 浏览IronXL.dll将其添加为项目引用。
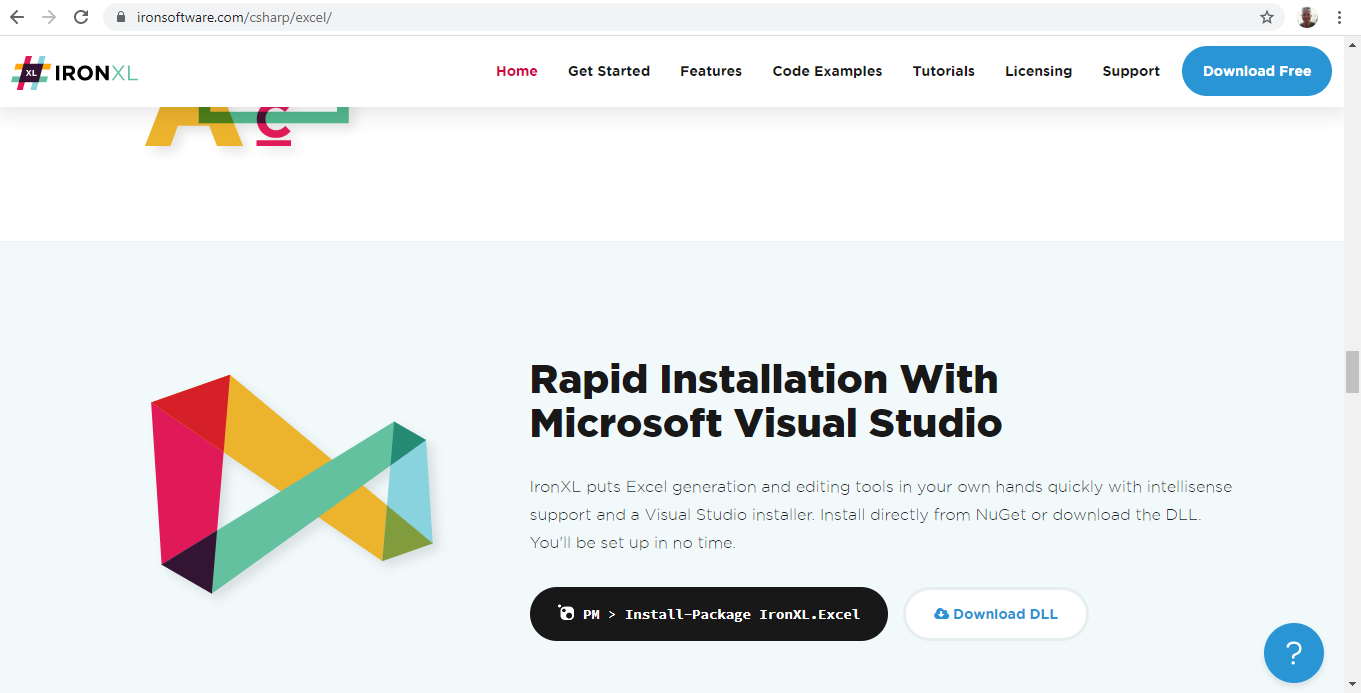 图 6 - 从官方下载 IronXL 库
如何设置我的.NET项目?
IronXL适用于任何.NET项目类型:控制台应用程序、ASP.NET web应用程序、API或桌面工具。 下面的示例使用了ASP.NET web应用程序,但相同的代码路径适用于所有项目模板。
按照以下步骤创建 ASP.NET 网站:
- 打开Visual Studio 2.单击文件 > 新项目
- 在"项目类型"列表中,选择"Visual C#"下的"Web"。
-
选择 ASP.NET Web 应用程序
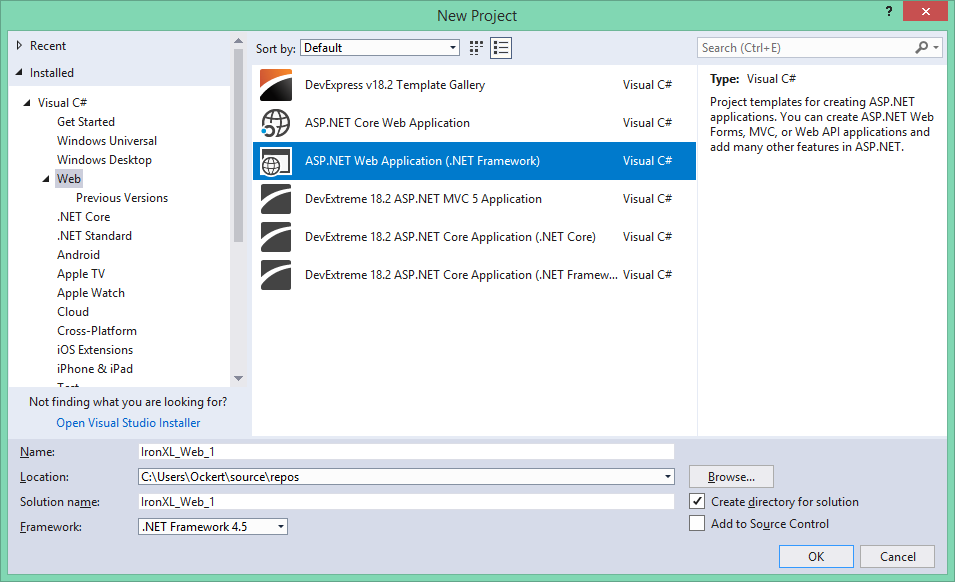
图 1 – Create new ASP.NET project
- 单击"确定"
-
选择 Web 表单模板

图 2 – Select Web Forms template
- 单击"确定"
项目准备就绪后,安装 IronXL 即可开始以编程方式创建 Excel 文件。
How Do I Create an Excel Workbook in C#?
新建工作簿是对WorkBook.Create的单次调用,文件格式被作为枚举传递:
:path=/static-assets/excel/content-code-examples/tutorials/create-excel-file-net-3.csWorkSheet workSheet = workBook.CreateWorkSheet("2020 Budget");Dim workSheet As WorkSheet = workBook.CreateWorkSheet("2020 Budget")Create方法支持XLS(Excel 97-2003)和XLSX(Excel 2007+)格式。 建议使用 XLSX 格式以获得更好的性能和更小的文件大小。
- XLSX :推荐用于所有现代 Excel 版本(2007 及更高版本)——文件更小,性能更佳
- XLS :与 Excel 97–2003 兼容的旧格式
如何向我的工作簿中添加工作表?
通过CreateWorkSheet添加工作表:
:path=/static-assets/excel/content-code-examples/tutorials/create-excel-file-net-4.csworkSheet["A1"].Value = "January";
workSheet["B1"].Value = "February";
workSheet["C1"].Value = "March";
workSheet["D1"].Value = "April";
workSheet["E1"].Value = "May";
workSheet["F1"].Value = "June";
workSheet["G1"].Value = "July";
workSheet["H1"].Value = "August";
workSheet["I1"].Value = "September";
workSheet["J1"].Value = "October";
workSheet["K1"].Value = "November";
workSheet["L1"].Value = "December";workSheet("A1").Value = "January"
workSheet("B1").Value = "February"
workSheet("C1").Value = "March"
workSheet("D1").Value = "April"
workSheet("E1").Value = "May"
workSheet("F1").Value = "June"
workSheet("G1").Value = "July"
workSheet("H1").Value = "August"
workSheet("I1").Value = "September"
workSheet("J1").Value = "October"
workSheet("K1").Value = "November"
workSheet("L1").Value = "December"一本练习册包含一张或多张练习题。 每个工作表都由行和列组成,单元格位于行和列的交叉点。 使用CreateWorkSheet方法向工作簿添加新工作表。
WorkBook.CreateWorkSheet(String):用给定的选项卡名称添加新工作表WorkSheet:按名称检索现有工作表 工作簿中的工作表名称必须唯一。
如何在Excel中设置单元格值?
如何手动设置单元格值?
单元格访问使用您在Excel中看到的相同的A1风格地址字符串:
:path=/static-assets/excel/content-code-examples/tutorials/create-excel-file-net-5.csRandom r = new Random();
for (int i = 2 ; i <= 11 ; i++)
{
workSheet["A" + i].Value = r.Next(1, 1000);
workSheet["B" + i].Value = r.Next(1000, 2000);
workSheet["C" + i].Value = r.Next(2000, 3000);
workSheet["D" + i].Value = r.Next(3000, 4000);
workSheet["E" + i].Value = r.Next(4000, 5000);
workSheet["F" + i].Value = r.Next(5000, 6000);
workSheet["G" + i].Value = r.Next(6000, 7000);
workSheet["H" + i].Value = r.Next(7000, 8000);
workSheet["I" + i].Value = r.Next(8000, 9000);
workSheet["J" + i].Value = r.Next(9000, 10000);
workSheet["K" + i].Value = r.Next(10000, 11000);
workSheet["L" + i].Value = r.Next(11000, 12000);
}Dim r As New Random()
For i As Integer = 2 To 11
workSheet("A" & i).Value = r.Next(1, 1000)
workSheet("B" & i).Value = r.Next(1000, 2000)
workSheet("C" & i).Value = r.Next(2000, 3000)
workSheet("D" & i).Value = r.Next(3000, 4000)
workSheet("E" & i).Value = r.Next(4000, 5000)
workSheet("F" & i).Value = r.Next(5000, 6000)
workSheet("G" & i).Value = r.Next(6000, 7000)
workSheet("H" & i).Value = r.Next(7000, 8000)
workSheet("I" & i).Value = r.Next(8000, 9000)
workSheet("J" & i).Value = r.Next(9000, 10000)
workSheet("K" & i).Value = r.Next(10000, 11000)
workSheet("L" & i).Value = r.Next(11000, 12000)
Next iValue属性接受包括字符串、数字、日期和布尔值在内的各种数据类型。 IronXL会根据数据类型自动格式化单元格。
如何动态设置单元格值?
当行数在运行时已知时,字符串插值使循环体易于阅读:
// Initialize random number generator for sample data
Random r = new Random();

// Populate cells with random budget data for each month
for (int i = 2; i <= 11; i++)
{
    // Set different budget categories with increasing ranges
    workSheet[$"A{i}"].Value = r.Next(1, 1000);     // Office Supplies
    workSheet[$"B{i}"].Value = r.Next(1000, 2000);  // Utilities
    workSheet[$"C{i}"].Value = r.Next(2000, 3000);  // Rent
    workSheet[$"D{i}"].Value = r.Next(3000, 4000);  // Salaries
    workSheet[$"E{i}"].Value = r.Next(4000, 5000);  // Marketing
    workSheet[$"F{i}"].Value = r.Next(5000, 6000);  // IT Services
    workSheet[$"G{i}"].Value = r.Next(6000, 7000);  // Travel
    workSheet[$"H{i}"].Value = r.Next(7000, 8000);  // Training
    workSheet[$"I{i}"].Value = r.Next(8000, 9000);  // Insurance
    workSheet[$"J{i}"].Value = r.Next(9000, 10000); // Equipment
    workSheet[$"K{i}"].Value = r.Next(10000, 11000); // Research
    workSheet[$"L{i}"].Value = r.Next(11000, 12000); // Misc
}

// Alternative: Set range of cells with same value
workSheet["A13:L13"].Value = 0; // Initialize totals row
// Initialize random number generator for sample data
Random r = new Random();
// Populate cells with random budget data for each month
for (int i = 2; i <= 11; i++)
{
// Set different budget categories with increasing ranges
workSheet[$"A{i}"].Value = r.Next(1, 1000); // Office Supplies
workSheet[$"B{i}"].Value = r.Next(1000, 2000); // Utilities
workSheet[$"C{i}"].Value = r.Next(2000, 3000); // Rent
workSheet[$"D{i}"].Value = r.Next(3000, 4000); // Salaries
workSheet[$"E{i}"].Value = r.Next(4000, 5000); // Marketing
workSheet[$"F{i}"].Value = r.Next(5000, 6000); // IT Services
workSheet[$"G{i}"].Value = r.Next(6000, 7000); // Travel
workSheet[$"H{i}"].Value = r.Next(7000, 8000); // Training
workSheet[$"I{i}"].Value = r.Next(8000, 9000); // Insurance
workSheet[$"J{i}"].Value = r.Next(9000, 10000); // Equipment
workSheet[$"K{i}"].Value = r.Next(10000, 11000); // Research
workSheet[$"L{i}"].Value = r.Next(11000, 12000); // Misc
}
// Alternative: Set range of cells with same value
workSheet["A13:L13"].Value = 0; // Initialize totals row' Initialize random number generator for sample data
Dim r As New Random()
' Populate cells with random budget data for each month
For i As Integer = 2 To 11
' Set different budget categories with increasing ranges
workSheet($"A{i}").Value = r.Next(1, 1000) ' Office Supplies
workSheet($"B{i}").Value = r.Next(1000, 2000) ' Utilities
workSheet($"C{i}").Value = r.Next(2000, 3000) ' Rent
workSheet($"D{i}").Value = r.Next(3000, 4000) ' Salaries
workSheet($"E{i}").Value = r.Next(4000, 5000) ' Marketing
workSheet($"F{i}").Value = r.Next(5000, 6000) ' IT Services
workSheet($"G{i}").Value = r.Next(6000, 7000) ' Travel
workSheet($"H{i}").Value = r.Next(7000, 8000) ' Training
workSheet($"I{i}").Value = r.Next(8000, 9000) ' Insurance
workSheet($"J{i}").Value = r.Next(9000, 10000) ' Equipment
workSheet($"K{i}").Value = r.Next(10000, 11000) ' Research
workSheet($"L{i}").Value = r.Next(11000, 12000) ' Misc
Next i
' Alternative: Set range of cells with same value
workSheet("A13:L13").Value = 0 ' Initialize totals row字符串插值($"...")使动态引用单元格变得容易。 Item索引器支持单个单元格和范围。
如何从数据库中导入数据到Excel?
将数据库中的数据导入Excel是一项常见需求:
:path=/static-assets/excel/content-code-examples/tutorials/create-excel-file-net-7.csworkSheet["A1:L1"].Style.SetBackgroundColor("#d3d3d3");workSheet("A1:L1").Style.SetBackgroundColor("#d3d3d3")本示例演示如何从数据库读取 Excel 数据、应用格式以及使用公式进行计算。 NumberFormat属性启用自定义数字格式化,就像在Excel中一样。
如何对Excel单元格应用格式?
如何在Excel中设置背景颜色?
背景、交替行颜色和字体颜色覆盖都通过单元格或范围上的Style对象进行管理:
// Set header row background to light gray using hex color
workSheet["A1:L1"].Style.SetBackgroundColor("#d3d3d3");

// Apply different colors for data categorization
workSheet["A2:A11"].Style.SetBackgroundColor("#E7F3FF"); // Light blue for January
workSheet["B2:B11"].Style.SetBackgroundColor("#FFF2CC"); // Light yellow for February

// Highlight important cells with bold colors
workSheet["L12"].Style.SetBackgroundColor("#FF0000"); // Red for totals
workSheet["L12"].Style.Font.FontColor = "#FFFFFF"; // White text

// Create alternating row colors for better readability
for (int row = 2; row <= 11; row++)
{
    if (row % 2 == 0)
    {
        workSheet[$"A{row}:L{row}"].Style.SetBackgroundColor("#F2F2F2");
    }
}
// Set header row background to light gray using hex color
workSheet["A1:L1"].Style.SetBackgroundColor("#d3d3d3");
// Apply different colors for data categorization
workSheet["A2:A11"].Style.SetBackgroundColor("#E7F3FF"); // Light blue for January
workSheet["B2:B11"].Style.SetBackgroundColor("#FFF2CC"); // Light yellow for February
// Highlight important cells with bold colors
workSheet["L12"].Style.SetBackgroundColor("#FF0000"); // Red for totals
workSheet["L12"].Style.Font.FontColor = "#FFFFFF"; // White text
// Create alternating row colors for better readability
for (int row = 2; row <= 11; row++)
{
if (row % 2 == 0)
{
workSheet[$"A{row}:L{row}"].Style.SetBackgroundColor("#F2F2F2");
}
}' Set header row background to light gray using hex color
workSheet("A1:L1").Style.SetBackgroundColor("#d3d3d3")
' Apply different colors for data categorization
workSheet("A2:A11").Style.SetBackgroundColor("#E7F3FF") ' Light blue for January
workSheet("B2:B11").Style.SetBackgroundColor("#FFF2CC") ' Light yellow for February
' Highlight important cells with bold colors
workSheet("L12").Style.SetBackgroundColor("#FF0000") ' Red for totals
workSheet("L12").Style.Font.FontColor = "#FFFFFF" ' White text
' Create alternating row colors for better readability
For row As Integer = 2 To 11
If row Mod 2 = 0 Then
workSheet($"A{row}:L{row}").Style.SetBackgroundColor("#F2F2F2")
End If
Next rowSetBackgroundColor方法接受十六进制颜色代码。 将背景色与Font.FontColor配对,以保持在较暗的填充中可读性的对比。
如何在Excel中创建边框?
边界有助于定义数据区域并改善数据结构:
:path=/static-assets/excel/content-code-examples/tutorials/create-excel-file-net-9.cs// Use IronXL built-in aggregations
decimal sum = workSheet["A2:A11"].Sum();
decimal avg = workSheet["B2:B11"].Avg();
decimal max = workSheet["C2:C11"].Max();
decimal min = workSheet["D2:D11"].Min();
// Assign value to cells
workSheet["A12"].Value = sum;
workSheet["B12"].Value = avg;
workSheet["C12"].Value = max;
workSheet["D12"].Value = min;' Use IronXL built-in aggregations
Dim sum As Decimal = workSheet("A2:A11").Sum()
Dim avg As Decimal = workSheet("B2:B11").Avg()
Dim max As Decimal = workSheet("C2:C11").Max()
Dim min As Decimal = workSheet("D2:D11").Min()
' Assign value to cells
workSheet("A12").Value = sum
workSheet("B12").Value = avg
workSheet("C12").Value = max
workSheet("D12").Value = minIronXL 支持多种边框类型,包括细边框、中等边框、粗边框、双边框、点状边框和虚线边框。 边框的每一边都可以独立设置样式。
How Do I Use Excel Formulas in C#?
IronXL在写入时评估Excel公式,因此工作簿保存后值是正确的:
// Use built-in aggregation functions for ranges
decimal sum = workSheet["A2:A11"].Sum();
decimal avg = workSheet["B2:B11"].Avg();
decimal max = workSheet["C2:C11"].Max();
decimal min = workSheet["D2:D11"].Min();

// Assign calculated values to cells
workSheet["A12"].Value = sum;
workSheet["B12"].Value = avg;
workSheet["C12"].Value = max;
workSheet["D12"].Value = min;

// Or use Excel formulas directly
workSheet["A12"].Formula = "=SUM(A2:A11)";
workSheet["B12"].Formula = "=AVERAGE(B2:B11)";
workSheet["C12"].Formula = "=MAX(C2:C11)";
workSheet["D12"].Formula = "=MIN(D2:D11)";

// Complex formulas with multiple functions
workSheet["E12"].Formula = "=IF(SUM(E2:E11)>50000,\"Over Budget\",\"On Track\")";
workSheet["F12"].Formula = "=SUMIF(F2:F11,\">5000\")";

// Percentage calculations
workSheet["G12"].Formula = "=G11/SUM(G2:G11)*100";
workSheet["G12"].FormatString = "0.00%";

// Ensure all formulas calculate
workSheet.EvaluateAll();
// Use built-in aggregation functions for ranges
decimal sum = workSheet["A2:A11"].Sum();
decimal avg = workSheet["B2:B11"].Avg();
decimal max = workSheet["C2:C11"].Max();
decimal min = workSheet["D2:D11"].Min();
// Assign calculated values to cells
workSheet["A12"].Value = sum;
workSheet["B12"].Value = avg;
workSheet["C12"].Value = max;
workSheet["D12"].Value = min;
// Or use Excel formulas directly
workSheet["A12"].Formula = "=SUM(A2:A11)";
workSheet["B12"].Formula = "=AVERAGE(B2:B11)";
workSheet["C12"].Formula = "=MAX(C2:C11)";
workSheet["D12"].Formula = "=MIN(D2:D11)";
// Complex formulas with multiple functions
workSheet["E12"].Formula = "=IF(SUM(E2:E11)>50000,\"Over Budget\",\"On Track\")";
workSheet["F12"].Formula = "=SUMIF(F2:F11,\">5000\")";
// Percentage calculations
workSheet["G12"].Formula = "=G11/SUM(G2:G11)*100";
workSheet["G12"].FormatString = "0.00%";
// Ensure all formulas calculate
workSheet.EvaluateAll();' Use built-in aggregation functions for ranges
Dim sum As Decimal = workSheet("A2:A11").Sum()
Dim avg As Decimal = workSheet("B2:B11").Avg()
Dim max As Decimal = workSheet("C2:C11").Max()
Dim min As Decimal = workSheet("D2:D11").Min()
' Assign calculated values to cells
workSheet("A12").Value = sum
workSheet("B12").Value = avg
workSheet("C12").Value = max
workSheet("D12").Value = min
' Or use Excel formulas directly
workSheet("A12").Formula = "=SUM(A2:A11)"
workSheet("B12").Formula = "=AVERAGE(B2:B11)"
workSheet("C12").Formula = "=MAX(C2:C11)"
workSheet("D12").Formula = "=MIN(D2:D11)"
' Complex formulas with multiple functions
workSheet("E12").Formula = "=IF(SUM(E2:E11)>50000,""Over Budget"",""On Track"")"
workSheet("F12").Formula = "=SUMIF(F2:F11,"">5000"")"
' Percentage calculations
workSheet("G12").Formula = "=G11/SUM(G2:G11)*100"
workSheet("G12").FormatString = "0.00%"
' Ensure all formulas calculate
workSheet.EvaluateAll()Min等方法,用于快速计算。 对于更复杂的情况,使用Formula属性直接设置Excel公式。
.Min()方法而不是原始公式字符串。 它们是类型安全的并且避免了编译时的公式语法错误。)}
如何设置工作表和打印属性?
using IronXL 保护单个工作表、冻结行和列,以及设置打印格式选项。
如何配置工作表属性?
保护工作表并控制查看选项:
:path=/static-assets/excel/content-code-examples/tutorials/create-excel-file-net-11.csworkSheet.SetPrintArea("A1:L12");
workSheet.PrintSetup.PrintOrientation = IronXL.Printing.PrintOrientation.Landscape;
workSheet.PrintSetup.PaperSize = IronXL.Printing.PaperSize.A4;workSheet.SetPrintArea("A1:L12")
workSheet.PrintSetup.PrintOrientation = IronXL.Printing.PrintOrientation.Landscape
workSheet.PrintSetup.PaperSize = IronXL.Printing.PaperSize.A4工作表保护功能可防止意外修改,而冻结窗格功能可在滚动时保持重要行或列可见。
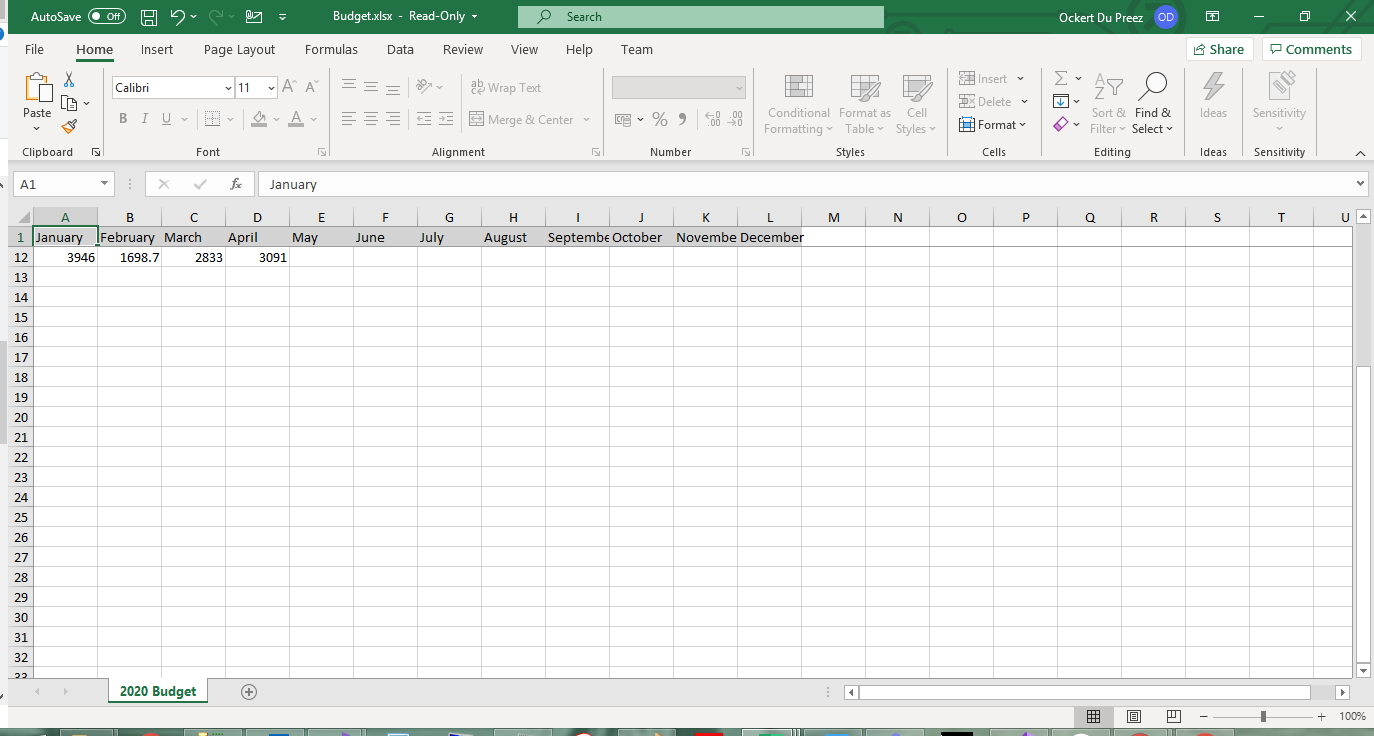 图 7 - 冻结的标题行在滚动时保持可见
 图 8 - 密码保护可防止未经授权的编辑
如何配置页面和打印设置?
通过WorkSheet.PrintSetup公开所有打印布局选项(方向、纸张大小、边距、缩放、页眉、页脚):
:path=/static-assets/excel/content-code-examples/tutorials/create-excel-file-net-12.csworkBook.SaveAs("Budget.xlsx");workBook.SaveAs("Budget.xlsx")IPrintSetup类提供了与Excel打印设置匹配的全面打印配置选项。
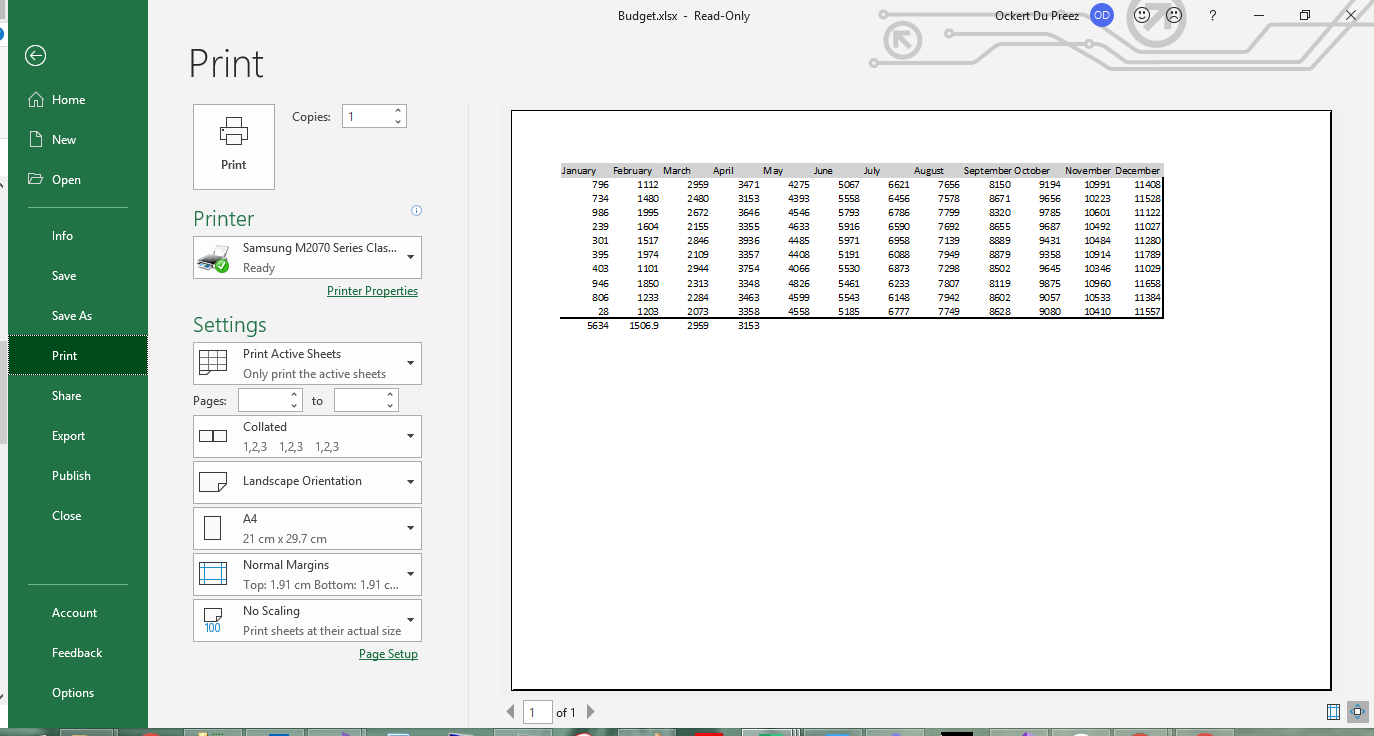 图 9 - 具有横向格式和自定义页边距的打印预览
如何保存我的Excel工作簿?
将工作簿保存为多种格式:
// Save as XLSX (recommended for modern Excel)
workBook.SaveAs("Budget.xlsx");

// Save as XLS for legacy compatibility
workBook.SaveAs("Budget.xls");

// Save as CSV for data exchange
workBook.SaveAsCsv("Budget.csv");

// Save as JSON for web applications
workBook.SaveAsJson("Budget.json");

// Save to stream for web downloads or cloud storage
using (var stream = new MemoryStream())
{
    workBook.SaveAs(stream);
    byte[] excelData = stream.ToArray();
    // Send to client or save to cloud
}

// Save with specific encoding for international characters
workBook.SaveAsCsv("Budget_UTF8.csv", System.Text.Encoding.UTF8);
// Save as XLSX (recommended for modern Excel)
workBook.SaveAs("Budget.xlsx");
// Save as XLS for legacy compatibility
workBook.SaveAs("Budget.xls");
// Save as CSV for data exchange
workBook.SaveAsCsv("Budget.csv");
// Save as JSON for web applications
workBook.SaveAsJson("Budget.json");
// Save to stream for web downloads or cloud storage
using (var stream = new MemoryStream())
{
workBook.SaveAs(stream);
byte[] excelData = stream.ToArray();
// Send to client or save to cloud
}
// Save with specific encoding for international characters
workBook.SaveAsCsv("Budget_UTF8.csv", System.Text.Encoding.UTF8);' Save as XLSX (recommended for modern Excel)
workBook.SaveAs("Budget.xlsx")
' Save as XLS for legacy compatibility
workBook.SaveAs("Budget.xls")
' Save as CSV for data exchange
workBook.SaveAsCsv("Budget.csv")
' Save as JSON for web applications
workBook.SaveAsJson("Budget.json")
' Save to stream for web downloads or cloud storage
Using stream = New MemoryStream()
workBook.SaveAs(stream)
Dim excelData() As Byte = stream.ToArray()
' Send to client or save to cloud
End Using
' Save with specific encoding for international characters
workBook.SaveAsCsv("Budget_UTF8.csv", System.Text.Encoding.UTF8)IronXL 支持多种导出格式,包括 XLSX、XLS、CSV、TSV 和 JSON。 Save方法根据文件扩展名选择格式。
- XLSX / XLS :完整的 Excel 格式,包含格式、公式和多个工作表
- CSV:用于数据交换的纯文本,每个文件一个工作表 JSON :用于 Web API 和数据管道的结构化输出
- Stream:内存输出,适用于web下载或云存储
生成实际上需要多久?
我在一台Windows 11机器(.NET 9.0.7)上进行了生成基准测试,以获得大多数生产导出结束时的工作簿大小的具体数字。 该工具在内存中构建一个10,000行、三列的XLSX文件,并通过单一SaveAs调用将其写入磁盘,无论是冷启动还是热启动。 完整项目在下面的CreateExcelBenchmark示例中。 三轮独立的进程启动结果大致如下:
| 手术 | 第一次冷启动(新鲜进程) | 10次迭代的热平均值 |
|---|---|---|
构建10,000行、3列的XLSX并SaveAs一次 |
大约570–910毫秒 | 大约350毫秒(范围240–450毫秒) |
冷启动数字主要由IronXL的程序集加载和JIT热身主导。一旦进程加热,生成时间就降到了中300毫秒范围内,背景活动的变化导致了一些运行间的变化。 对于大得多的工作簿(成千上万的行、多张工作表、沉重的样式),我在内存中编写整个工作簿,并在最后调用SaveAs一次。 "为什么我的导出如此慢?"票证中最常见原因是我们看到的一个问题是,在工作簿增长时,在循环内反复调用SaveAs:每次保存都会序列化整个当前状态,因此每次迭代的成本都会增加。
常见问题
有些事情经常会困扰人,因此它们值得自己的一节。
忘记日期和货币的FormatString
我看到格式陷阱最多的就是将FormatString。 虽然日期存储正确,但在您应用格式字符串例如"yyyy-MM-dd"之前,Excel会将其显示为原始序列号(45292表示2024-01-01)。 货币也存在相同问题:数字正确,但没有"$#,##0.00"它会呈现为简单的小数。 我现在是在相邻的行上写值和格式,所以两者不会偏离:
var dateCell = sheet["A2"];
dateCell.Value = DateTime.Today;
dateCell.FormatString = "yyyy-MM-dd";

var moneyCell = sheet["B2"];
moneyCell.Value = 1499.95m;
moneyCell.FormatString = "$#,##0.00";
var dateCell = sheet["A2"];
dateCell.Value = DateTime.Today;
dateCell.FormatString = "yyyy-MM-dd";
var moneyCell = sheet["B2"];
moneyCell.Value = 1499.95m;
moneyCell.FormatString = "$#,##0.00";Dim dateCell = sheet("A2")
dateCell.Value = DateTime.Today
dateCell.FormatString = "yyyy-MM-dd"
Dim moneyCell = sheet("B2")
moneyCell.Value = 1499.95D
moneyCell.FormatString = "$#,##0.00"XLS将静默截断在65,536行
这一点在文章顶部的格式选择部分有所提及,但它有其意义,因为故障模式是无声的:ExcelFileFormat.XLS在每个工作表上限制为65,536行,超过此限制的行没有异常或警告就被省略。 导出"成功"而您的数据却不见了。 除非下游系统确实无法读取,否则任何数据密集型都选择为XLSX。
"Excel说文件已损坏"
如果生成的文件拒绝打开或Excel声称它已损坏,原因几乎总是两个。 要么文件流没有正确释放,因此磁盘上的字节被截断; 或者您写入的路径仍然被先前的运行锁定,因此只有一部分数据通过。 确保using块。
基准数字的示例项目
如果您想重现之前的时间数字,测试工具是一个小的.NET 9控制台应用程序:
:path=/static-assets/excel/content-code-examples/tutorials/create-excel-file-net-15.cs// CreateExcelBenchmark/Program.cs (excerpt)
IronXL.License.LicenseKey = Environment.GetEnvironmentVariable("IRONXL_LICENSE_KEY");
var sw = Stopwatch.StartNew();
var workbook = WorkBook.Create(ExcelFileFormat.XLSX);
var sheet = workbook.CreateWorkSheet("Data");
sheet["A1"].Value = "Id";
sheet["B1"].Value = "Name";
sheet["C1"].Value = "Amount";
for (int i = 0; i < 10_000; i++)
{
int row = i + 2;
sheet[$"A{row}"].Value = i + 1;
sheet[$"B{row}"].Value = $"Item {i + 1}";
sheet[$"C{row}"].Value = (i + 1) * 1.25m;
}
workbook.SaveAs("Generated.xlsx");
sw.Stop();
Console.WriteLine($"cold: {sw.Elapsed.TotalMilliseconds:F1} ms");
Imports System
Imports System.Diagnostics
Imports IronXL

Module Program
    Sub Main()
        License.LicenseKey = Environment.GetEnvironmentVariable("IRONXL_LICENSE_KEY")

        Dim sw As Stopwatch = Stopwatch.StartNew()
        Dim workbook As WorkBook = WorkBook.Create(ExcelFileFormat.XLSX)
        Dim sheet As WorkSheet = workbook.CreateWorkSheet("Data")
        sheet("A1").Value = "Id"
        sheet("B1").Value = "Name"
        sheet("C1").Value = "Amount"
        For i As Integer = 0 To 9999
            Dim row As Integer = i + 2
            sheet($"A{row}").Value = i + 1
            sheet($"B{row}").Value = $"Item {i + 1}"
            sheet($"C{row}").Value = (i + 1) * 1.25D
        Next
        workbook.SaveAs("Generated.xlsx")
        sw.Stop()
        Console.WriteLine($"cold: {sw.Elapsed.TotalMilliseconds:F1} ms")
    End Sub
End Module在dotnet run -c Release下运行它,并代入您自己的行数、列数或样式,看看随着工作簿复杂性的增加,数字如何变化。
对象参考和资源
IronXL API参考涵盖了本教程涉及的每个类和方法,以及那些未涉及的方法。
相关Excel操作的其他教程:
摘要
IronXL.Excel生成XLSX、XLS、CSV和JSON格式的Excel工作簿,而不依赖于Microsoft Office或Interop。我在每个项目中遵循的步骤相同:创建工作簿,添加工作表,写入值和公式,在显示重要的地方设置格式字符串,最后保存一次。
常见问题解答
如何在 C# 中不使用 Interop 创建 Excel 文件?
您可以通过使用 IronXL 创建不使用 Interop 的 Excel 文件,这提供了一个简单的 API:WorkBook workBook = WorkBook.Create(ExcelFileFormat.XLSX)。此方法在任何 .NET 平台上都适用,无需安装 Microsoft Office。
C# 支持哪些平台进行 Excel 文件创建?
IronXL支持在.NET 10、.NET 9、.NET 8、.NET Core、.NET Framework 4.6.2+上创建Excel文件,运行在Windows、macOS、Linux、Docker、Azure和AWS环境中。
如何为 Excel 生成安装 C# 库?
通过 Visual Studio 中的 NuGet 包管理器安装 IronXL,使用命令PM> Install-Package IronXL.Excel,或直接从 nuget.org 下载。
如何以编程方式创建新的 Excel 工作簿?
using IronXL 创建工作簿:WorkBook workbook = WorkBook.Create(ExcelFileFormat.XLSX),然后使用workbook.CreateWorkSheet("SheetName")添加工作表。
如何使用 C# 在 Excel 工作表中设置单元格值?
using IronXL 的直观语法设置单元格值:worksheet["A1"].Value = "Hello World"或设置范围:worksheet["A1:A10"].Value = 100。
可以以编程方式为 Excel 单元格应用格式吗?
可以,IronXL 支持综合格式设置,包括背景颜色(cell.Style.SetBackgroundColor("#FF0000")),边框,字体和数字格式。
如何在 C# 中使用 Excel 公式?
using IronXL 的 Formula 属性应用公式:worksheet["A1"].Formula = "=SUM(B1:B10)",或使用内置方法如range.Sum(),range.Avg()。
我如何用密码保护 Excel 工作表?
using worksheet.ProtectSheet("YourPassword") 在 IronXL 中保护工作表,以防止未经授权的修改。
如何配置 Excel 文件的打印设置?
using IronXL 的 PrintSetup 设置打印属性:worksheet.PrintSetup.PrintOrientation = PrintOrientation.Landscape 和worksheet.SetPrintArea("A1:Z100")。
如何以不同格式保存 Excel 工作簿?
using IronXL 的 SaveAs 方法保存工作簿:workbook.SaveAs("file.xlsx")用于 XLSX,或使用SaveAsCsv(),SaveAsJson()用于其他格式。
如何用数据库数据填充 Excel 表?
using IronXL 填充工作表,通过从数据库获取数据并使用worksheet["A1"].Value = dataFromDatabase方法设置在单元格中。
如何在 C# 中在 Excel 表中实现冻结窗格功能?
通过 IronXL 使用worksheet.FreezePanes(1, 1)冻结窗格,以锁定顶行和最左列,方便导航。


还在滚动吗?
想快速获得证据? PM > Install-Package IronXL.Excel
运行示例 观看您的数据变成电子表格。


